PawPortrait Journal
How to Turn Your Pet Photo Into a 3D Figurine With AI
Aug 27, 2026
“Learn how to turn your pet photo into a 3D figurine with AI. Follow our complete step-by-step workflow from photo prep to 3D mesh generation and physical printing.”
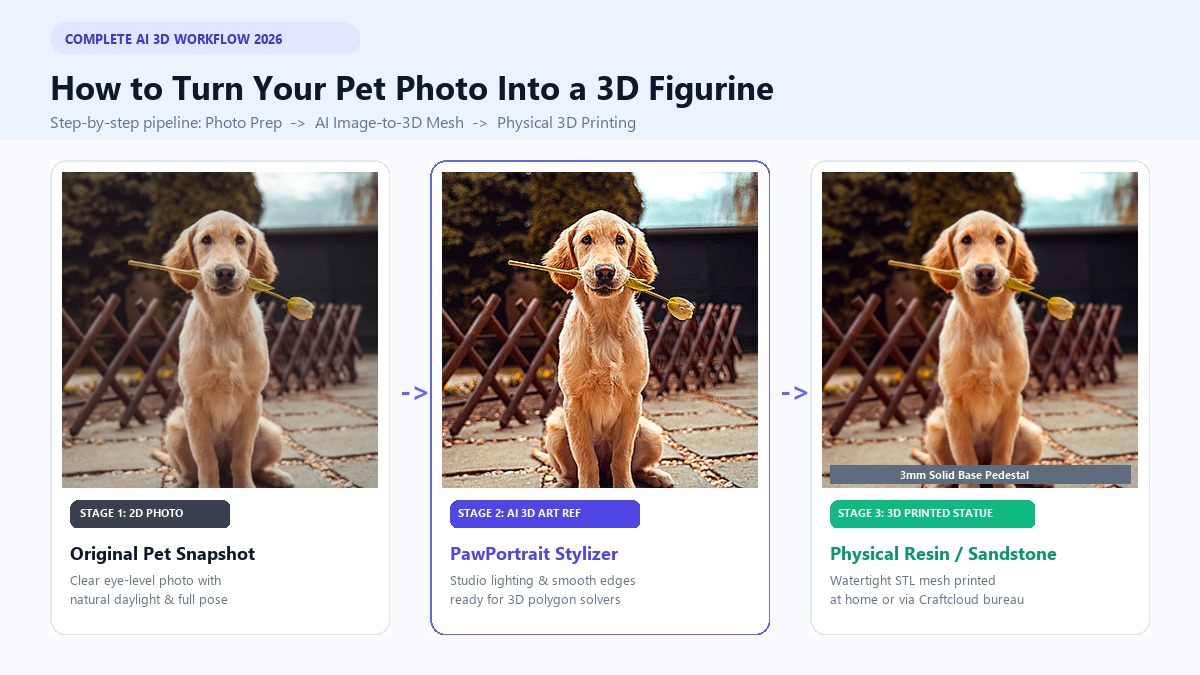
Turning your pet photo into a custom 3D figurine with AI requires a simple three-phase workflow: first, convert your favorite 2D pet photo into a clean, studio-lit 3D character reference; second, feed that image into an AI image-to-3D mesh generator to produce a watertight STL or OBJ file; and third, slice and print the model on a desktop 3D printer or order it through an on-demand printing bureau like Craftcloud.
If you've ever wanted a palm-sized statue of your dog or cat sitting on your desk, traditional custom sculptors charge $150 to $300 and take a month to deliver. Thanks to modern AI mesh tools and single-image depth modeling, you can now produce a print-ready, high-resolution 3D pet figurine in under an hour for a fraction of that cost—even if you have zero 3D modeling experience.
Key Takeaways
- The Two-Stage Method Yields Cleanest Meshes: Raw smartphone photos with busy backgrounds produce distorted, "melted" 3D geometry. Converting your photo into a clean 3D cartoon pet portrait first isolates your pet's silhouette and creates smooth, printable topology.
- No 3D Printer Required: You don't need to invest $500+ in printing hardware. Exporting your AI-generated STL file and uploading it to on-demand print services delivers a high-detail resin or full-color sandstone figurine to your door for $18–$28.
- Resin (SLA) Wins on Fine Detail: For small 2-to-4-inch figurines with intricate fur and facial markings, resin printers outperform filament (FDM) printers by eliminating visible layer lines.
- Always Add a Base Pedestal: Adding a 3mm oval or circular display base in your slicer prevents thin paw breakage and eliminates 90% of bed adhesion failures during the physical print.
How Image-to-3D AI Generation Works for Pets
Traditional 3D modeling relies on manual digital clay sculpting in software like ZBrush or multi-angle photogrammetry. Photogrammetry requires 40 to 80 synchronized camera shots of a perfectly stationary animal. If you've ever tried asking an energetic French Bulldog or a curious cat to freeze in place while circling them with a camera, you know it's nearly impossible for pet parents.
Modern generative AI solves this through single-image neural reconstruction. When you upload a 2D picture to an image-to-3D engine, the neural network performs three core operations simultaneously:
Depth map estimation calculates surface depth, identifying which features project forward and which recede.
Next, volumetric hallucination predicts the unseen backside, tail positioning, and rear leg musculature based on vast canine and feline datasets.
Finally, polygon mesh generation wraps a continuous geometric skin over the predicted volume, generating a standard 3D mesh file—typically formatted as an STL or OBJ file.
+------------------+      +-------------------+      +------------------+
|  2D Pet Picture  | ---> |  AI Depth & Mesh  | ---> | Print-Ready STL  |
|  (Source Photo)  |      |   Neural Engine   |      |  (3D Mesh File)  |
+------------------+      +-------------------+      +------------------+
                                                               |
                                                               v
                                                     +------------------+
                                                     | Physical Figurine|
                                                     | (Resin/Sandstone)|
                                                     +------------------+
While this technology sounds effortless, feeding raw, cluttered smartphone snapshots directly into 3D generators often produces "melted cheese geometry." Real-world shadows, patterned rugs, and loose cushions confuse the AI's depth sensor.
To overcome this hurdle, creators use a proven two-stage conversion pipeline.
Step 1: Prepare Your Pet Photo (The "Stylize First" Secret)
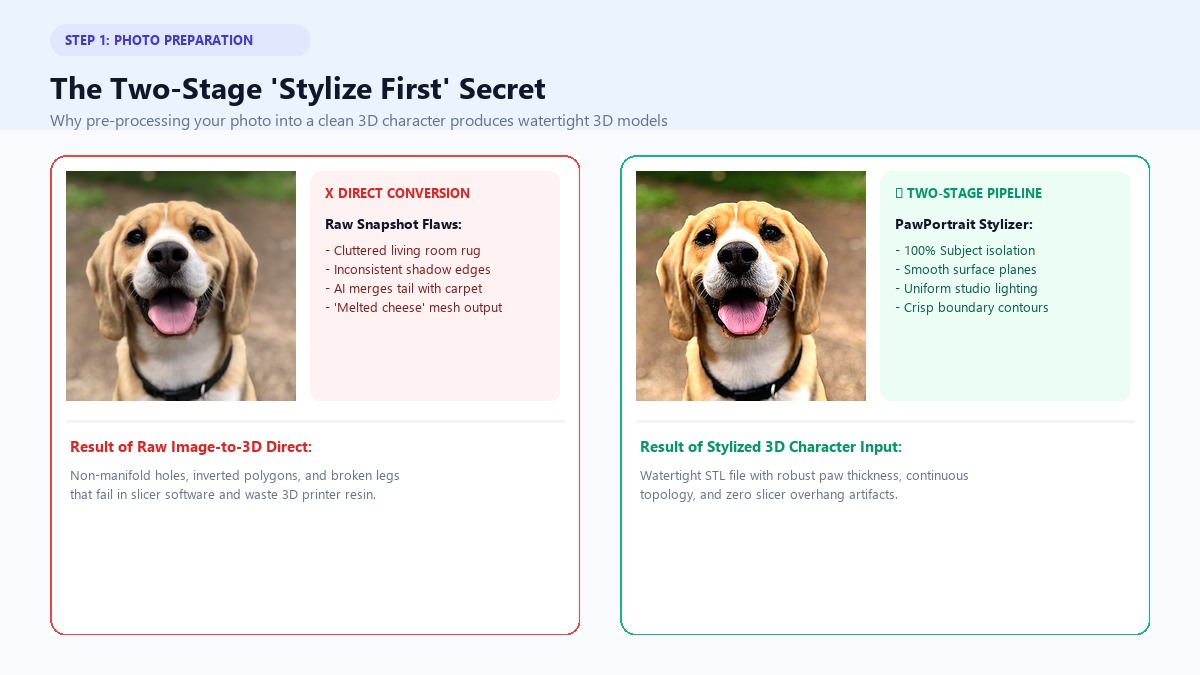
The single biggest factor in your figurine's final quality is the clarity of your input photo. AI 3D generators need clean edges, consistent lighting, and clear subject isolation.
When Sarah tried converting a smartphone photo of her rescue Beagle, Copper, directly into a 3D mesh, the algorithm merged Copper's tail with her living room rug fringe. The resulting 3D print looked like a dog permanently welded to a carpet tile.
The solution is the Two-Stage Workflow. Before generating a 3D mesh, convert your everyday pet snapshot into a clean, studio-lit digital character using PawPortrait's 3D cartoon portrait generator.
Stage 1: Raw Pet Photo  --->  PawPortrait 3D Cartoon Art  (Clean Studio Lighting)
Stage 2: 3D Cartoon Art  --->  AI Image-to-3D Mesh Engine  (Watertight STL File)
+-------------------------------------------------------------------------+
|                  THE TWO-STAGE STYLIZATION PIPELINE                     |
|                                                                         |
|  [Raw Pet Photo]                                                        |
|   - Uneven room shadows                                                 |
|   - Busy couch/rug background                                           |
|   - Fuzzy fur edge confusion                                            |
|          |                                                              |
|          v  (PawPortrait 3D Cartoon Engine)                             |
|  [Clean 3D Stylized Character Art]                                      |
|   - 100% subject isolation                                              |
|   - Defined facial structure & expressive eyes                          |
|   - Uniform studio lighting & smooth surface planes                     |
|          |                                                              |
|          v  (AI Image-to-3D Mesh Tool: Meshy / Tripo3D)                 |
|  [Watertight, Print-Ready 3D Mesh (STL/OBJ)]                            |
+-------------------------------------------------------------------------+
Best Practices for Selecting Your Source Photo:
- Full-Body or Sitting Pose: Choose a photo where your pet sits upright on all fours. Avoid photos where paws are tucked beneath blankets or bodies.
- Eye-Level Perspective: Take the photo at your pet's eye level rather than looking down from standing height. This preserves accurate body proportions.
- Distinct Features: Ensure your pet's distinctive markings—such as eye patches, chest blazes, or ear tilts—are clearly visible in natural daylight.
- One-Click Pre-Processing: Upload your image to turn pet photo into portrait and select the 3D Cartoon Character style. This renders your dog or cat in an animated aesthetic with bold contours, smooth volumes, and studio lighting that AI mesh tools interpret accurately.
If you're working with dog breeds featuring heavy coats or unique facial folds, check out our specialized custom dog portraits guide to match your pup's signature breed traits before 3D rendering.
Step 2: Generate Your 3D Model with AI
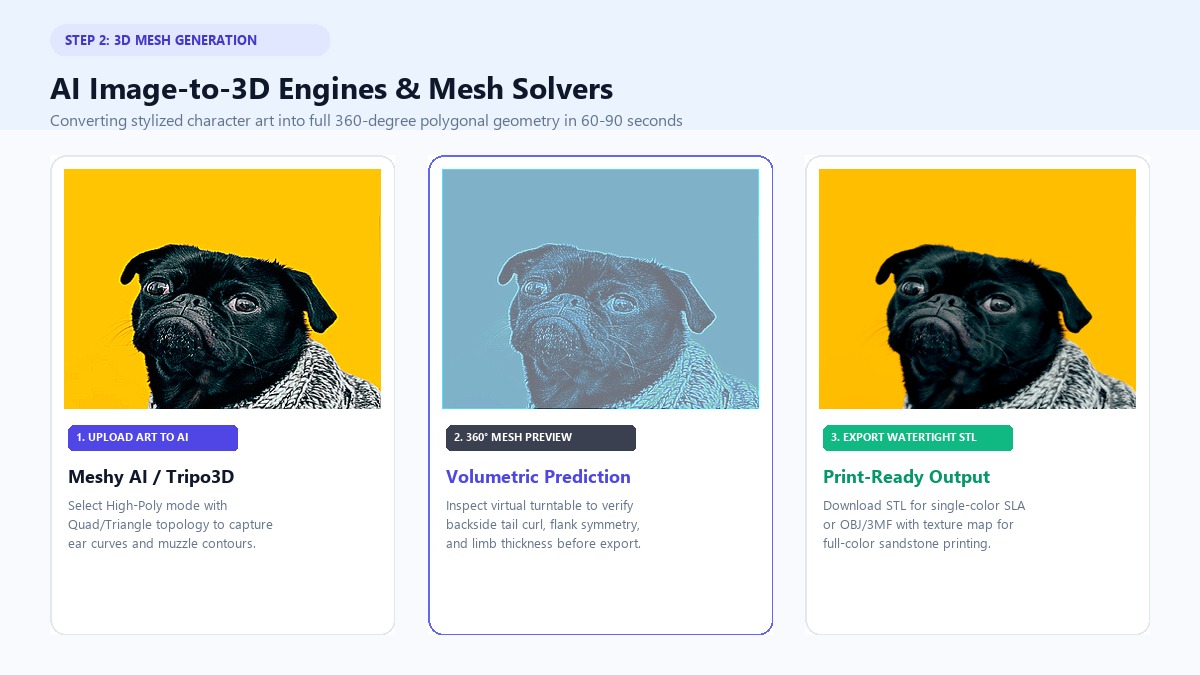
Once you have your stylized, high-contrast pet image, you can feed it into an AI image-to-3D mesh generation platform. Several dedicated engines specialize in turning 2D character art into 3D polygonal geometry.
+-------------------+--------------------+-------------------+---------------------+
| AI Platform       | Output Formats     | Generation Speed  | Best Use Case       |
+-------------------+--------------------+-------------------+---------------------+
| Meshy AI          | STL, OBJ, 3MF, GLB | 60–90 seconds     | High-detail models  |
| Tripo3D           | STL, OBJ, USDZ     | 30–45 seconds     | Fast prototyping    |
| Bambu MakerLab    | 3MF, STL           | 2–3 minutes       | Multi-color FDM     |
| Sloyd AI          | OBJ, GLTF          | 45–60 seconds     | Stylized miniatures |
+-------------------+--------------------+-------------------+---------------------+
Walkthrough: Converting Your Stylized Art to an STL File
First, open your preferred 3D generator (such as Meshy AI or Tripo3D) and navigate to the Image to 3D workspace. Upload your reference image cleanly.
Second, choose High Poly / Fine Detail mode. Set the topology preference to Triangles or Quad Remesh to ensure smooth curve transitions around the ears and muzzle.
Third, generate your initial preview. The system constructs a 360-degree preview within 60 to 90 seconds. Rotate the virtual camera around your pet to inspect the backside, flank symmetry, and tail curvature.
Fourth, refine the model if needed. If the AI misinterpreted the back paws or added unwanted bumps, hit Regenerate or adjust the surface smoothing slider.
Finally, export your finalized model in .STL format for single-color prints, or .3MF / .OBJ with texture map if you plan to use full-color 3D printing.
Watch this video walkthrough showing how 2D concept art translates into sliced 3D printable meshes:
https://www.youtube.com/watch?v=Fj2F7eXv2b0
Step 3: Inspect, Repair & Add a Sturdy Display Base
Before sending any AI-generated file to a 3D printer, you must verify that the digital mesh is watertight (also known as manifold geometry). Because generative models build surfaces mathematically, they occasionally leave microscopic holes, inverted normals, or paper-thin sections around tails and ankles.
Liam downloaded an AI mesh of his long-haired cat Barnaby. His slicer gave an error warning: Model has 142 non-manifold edges. Because the paws floated 0.5mm above the virtual build plate, the printer extruded plastic into mid-air, creating a bundle of plastic spaghetti.
Non-Manifold Mesh (Floating Paws)  --->  Print Failure (Plastic Spaghetti)
Mesh With Added 3mm Pedestal Base  --->  100% Solid Bed Adhesion & Flawless Print
3 Essential Mesh Preparation Steps:
- Run an Automated Mesh Repair: In Bambu Studio or PrusaSlicer, right-click your imported model and select Fix by Windows / Netfabb to seal surface holes. In Blender (free open-source software at blender.org), enable the built-in 3D Print Toolbox add-on, click Check All, and hit Make Manifold.
- Thicken Fragile Features: Slender dog tails, cat whiskers, and thin ears often measure under 0.8mm thick in raw AI outputs. In your slicer or Blender, use the Sculpt -> Inflate brush to thicken delicate extremities to at least 1.5mm so they won't snap during support removal.
- Add a 3mm Pedestal Base: The easiest way to guarantee a successful physical print is fusing a solid base underneath your pet's paws. In your slicer, right-click the build plate, select Add Primitive -> Cylinder (or Ellipse), set height to 3.0mm, scale diameter across all four paws, and merge using Boolean Union.
For feline lovers preparing stylized 3D sculpts of cats with delicate tail curls, exploring our custom cat portraits will help you dial in balanced poses that keep tails tucked securely against hind legs.
Step 4: Print Your Figurine (DIY Printer vs On-Demand Bureaus)
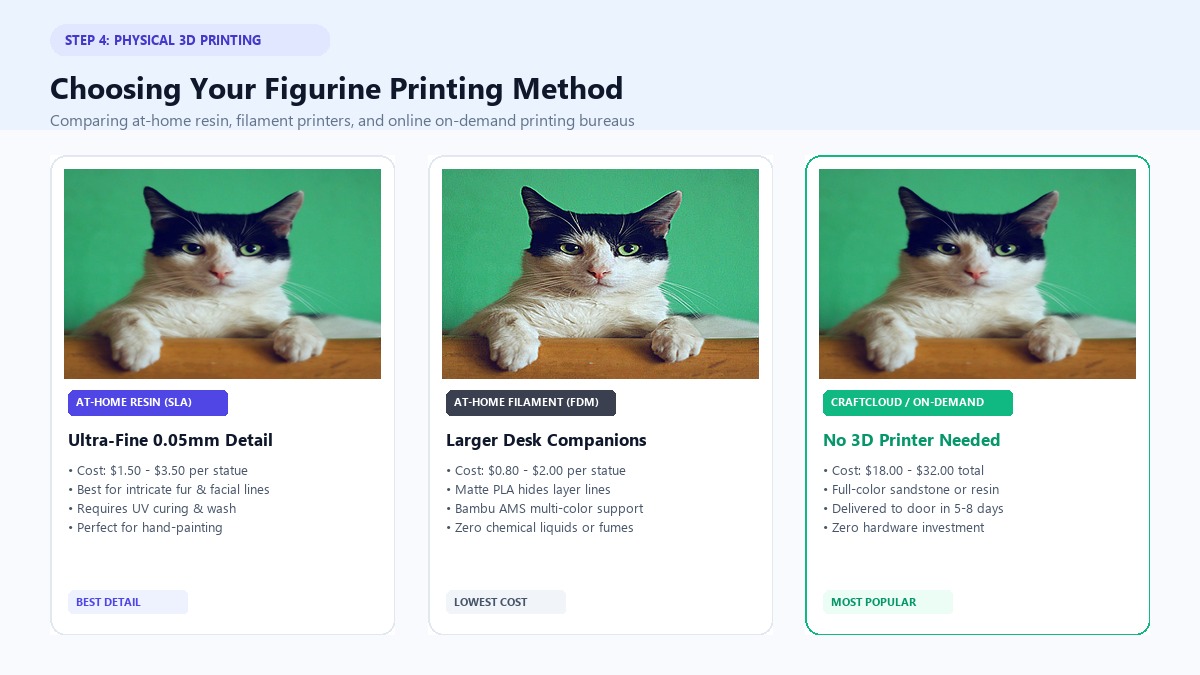
You have a repaired STL file ready to go. Now you need to decide how to turn those digital polygons into physical resin, plastic, or full-color sandstone.
                           DECIDING YOUR PRINT METHOD
                                        |
         +------------------------------+------------------------------+
         |                                                             |
   [ Own a 3D Printer? ]                                   [ No 3D Printer at Home ]
         |                                                             |
   +-----+-----+                                                       |
   |           |                                                       v
[Resin/SLA]  [Filament/FDM]                                  [On-Demand Print Bureau]
- Best fur    - Best for big toys                            - Craftcloud / FacFox
- 0.05mm res  - Low chemical mess                            - Full-color sandstone
- Primed/dry  - Multi-color AMS                              - Ships in 5–7 days
Option A: At-Home Resin (SLA) Printing (Best for Intricate Detail)
If you own an MSLA resin printer (such as an Elegoo Mars/Saturn or Anycubic Photon), this is the gold standard for miniature pet statues. Set your layer height between 0.03mm and 0.05mm. Tilt your pet figurine backward at a 35-to-45-degree angle on the build plate to keep support marks on the backside. Wash in 99% Isopropyl Alcohol for 3 minutes, remove supports, and cure under 405nm UV light for 3 to 5 minutes.
Option B: At-Home Filament (FDM) Printing (Best for Larger Desk Companions)
If you have a filament printer like a Bambu Lab A1/P1S or Creality Ender 3, use Matte PLA to hide layer lines. Set your layer height to 0.12mm with a standard 0.4mm nozzle. Use 15% Gyroid infill for balanced weight and structural rigidity. Enable Tree Supports (Organic) for effortless, clean breakaway around underbellies and muzzles.
Option C: On-Demand 3D Printing Bureaus (No Printer Required)
Over 80% of people who create AI pet models don't own a 3D printer. You don't need one. Online print-on-demand services bridge this gap seamlessly.
Visit an on-demand manufacturing aggregator like Craftcloud3D or FacFox and upload your repaired .STL or .OBJ file.
Select standard resin for a smooth finish ready for hand-painting ($14–$22), or choose full-color sandstone ($24–$38) to bake fur colors directly into the physical statue.
Your custom pet statue will arrive at your door in 5 to 8 business days.
While waiting for your physical figurine to ship, you can create matching social cards and meme avatars for your pet using PawPortrait's funny pet portraits & roasts generator.
Step 5: Post-Processing, Painting & Sealing (The 10-Minute Mini Hack)
If you printed your pet in single-color resin or PLA, painting it doesn't require professional fine-art training. You can achieve an authentic finish using the simple four-step "Wash and Drybrush" method favored by miniature hobbyists.
[Raw 3D Print] ---> [Grey Primer] ---> [Base Acrylic Coat] ---> [Dark Wash + Matte Seal]
Materials Needed:
- 1 can of neutral grey or matte white acrylic spray primer ($6)
- Basic craft acrylic paints matching your pet's coat ($8)
- 1 bottle of miniature wash like Citadel Nuln Oil or Army Painter Strong Tone ($5)
- 1 small flat drybrush and 1 fine detail brush ($4)
- 1 can of matte clear coat spray sealant ($7)
The 4-Step Painting Workflow:
- Prime the Surface: Lightly spray your figurine from 8 inches away with 2 thin coats of grey primer. Primer creates the mechanical tooth needed for acrylic paint to bond without peeling.
- Block in Base Colors: Paint large color blocks representing your pet's primary coat colors. Keep paint slightly thinned with water to avoid obscuring fine fur texture.
- The Magic Wash Technique: Once base coats dry, apply an all-over wash of diluted dark brown or black miniature shade. The fluid wash automatically settles into low crevices, creating instant shadow depth.
- Drybrush Highlights & Seal: Dip a flat brush into a lighter fur shade, wipe 90% off onto paper towel, and gently flick bristles across raised edges. Paint eyes and nose with gloss black, then mist with matte clear coat.
Cost, Material & Timeline Comparison
How does DIY AI 3D figurine creation stack up against professional print bureaus and traditional custom hand-sculpting? Here is the complete breakdown:
| Method | Upfront Hardware Cost | Per-Figurine Cost | Turnaround Time | Detail & Likeness | Best For |
|---|---|---|---|---|---|
| DIY Home Resin (SLA) | $200 – $450 | $1.50 – $3.50 | 2 – 4 hours | High (0.05mm) | Makers with home workshop setups |
| DIY Home Filament (FDM) | $200 – $600 | $0.80 – $2.00 | 4 – 8 hours | Medium (0.12mm) | Large, durable desk toys & stylized pets |
| On-Demand Bureau (Craftcloud) | $0.00 | $18.00 – $32.00 | 5 – 8 days | Professional High | Anyone without a 3D printer |
| Traditional Clay / 3D Sculptor | $0.00 | $150.00 – $350.00 | 3 – 6 weeks | Artisanal Handcraft | High-budget luxury heirlooms |
| PawPortrait 2D Digital Art | $0.00 | $0.40 – $0.62 | 30 seconds | Fine Art Painting | Instant wallpapers, canvas prints & roasts |
As shown in the table, combining PawPortrait's affordable credit packs with modern AI mesh tools cuts production costs by up to 90% while delivering physical keepsakes in a fraction of the traditional turnaround time.
Troubleshooting Common AI 3D Printing Pitfalls
When creating 3D pet statues with AI, you might encounter a few common quirks. Here is how to diagnose and resolve them in minutes:
1. The "Mushy Fur" Problem
- Symptom: The 3D model looks like a lumpy clay blob with no defined fur planes.
- Fix: Avoid using photos with extreme telephoto background blur. Pre-process the image through PawPortrait using the 3D Cartoon style. Its crisp cell shading gives the AI clear boundary lines to build sharp polygonal planes.
2. Broken Paws and Snapped Tails During Support Removal
- Symptom: Delicate extremities snap off when clipping away printing supports.
- Fix: Use warm water (about 120°F / 50°C) to soften resin prints for 30 seconds before pulling supports off. For filament prints, switch to Organic/Tree Supports with a 0.2mm Z-distance top contact offset for easy peeling.
3. Model Tipping Over on the Build Plate
- Symptom: The figurine detaches from the print bed halfway through the print job.
- Fix: Never print an animal standing on individual paw pads alone. Always add a 3mm oval base underneath the paws in your slicer to maximize print bed surface area.
4. Slicer Rejects the File / Slicing Artifacts
- Symptom: Slicer software freezes or generates strange horizontal lines through the torso.
- Fix: The mesh contains unclosed holes. Pass the STL through the free Netfabb auto-repair function inside your slicer or use Blender's Voxel Remesh tool set to a voxel size of 0.05.
Frequently Asked Questions (FAQ)
Can I turn a single 2D pet photo into a 3D figurine without multiple angles?
Yes. Modern generative AI image-to-3D tools (like Meshy, Tripo3D, and Bambu MakerLab) are trained on millions of 3D objects, allowing them to predict your pet's backside, spine, and tail structure from a single clear photo. For best results, use a sitting front-three-quarter pose.
How much does it cost to turn a pet photo into a 3D figurine with AI?
Generating your stylized reference art on PawPortrait costs roughly $0.50 using standard credits, and AI 3D mesh generation ranges from free to $5. If you print at home, material costs under $3.00. If you order via an on-demand printing bureau like Craftcloud, expect to pay between $18 and $32 total.
Which 3D printing material is best for custom pet statues?
For smooth, detailed figurines under 4 inches that you plan to hand-paint, standard photopolymer resin (SLA) is the best choice. If you want a full-color statue without painting, full-color sandstone (binder jetting) bakes realistic fur colors directly into the composite material.
What file format do I need for 3D printing an AI pet model?
The industry standard file format for single-color 3D printing is an .STL file. If you are using a multi-color printer (like a Bambu Lab with AMS) or ordering a full-color sandstone print, export your model as a .3MF or .OBJ file with an accompanying PNG texture map.
Do I need to own a 3D printer to make an AI pet figurine?
No. Once your AI tool generates the STL or OBJ file, you can upload the file to online 3D printing services like Craftcloud, FacFox, or Sculpteo. They will print your figurine in industrial-grade resin or sandstone and ship the finished piece directly to your door.
Conclusion & Next Steps
Transforming your pet's photo into a custom 3D figurine with AI is no longer reserved for skilled 3D sculptors or expensive boutique studios. By pairing a stylized reference image with neural 3D generators and accessible on-demand printing services, you can create a permanent, tangible keepsake of your best friend in just a few clicks.
Your Action Plan for This Week:
- Choose Your Pet's Best Photo: Pick a bright, eye-level photo of your dog or cat sitting attentively.
- Generate Your 3D Reference Art: Head over to PawPortrait's Creation Studio, select the 3D Cartoon style, and render a clean, studio-lit character image in under 60 seconds.
- Convert to a 3D Mesh: Upload your stylized portrait to Meshy or Tripo3D to generate a watertight STL file.
- Print & Display: Send the file to your home 3D printer or upload it to Craftcloud to receive your custom pet statue at home.
Ready to see how your dog or cat looks as a stylized 3D character? Start creating with PawPortrait today and turn your favorite pet moments into gallery-quality art, personality roast cards, and printable 3D keepsakes!